Ferrari 575M Maranello F1 (Part 1)
This ‘Minor Correction Detail’ was performed for the owner of a local Auckland law firm. The vehicle was delivered to us at 6pm on Friday evening, with a view to having it completed in time for a Ferrari Owners Club meeting later that weekend.
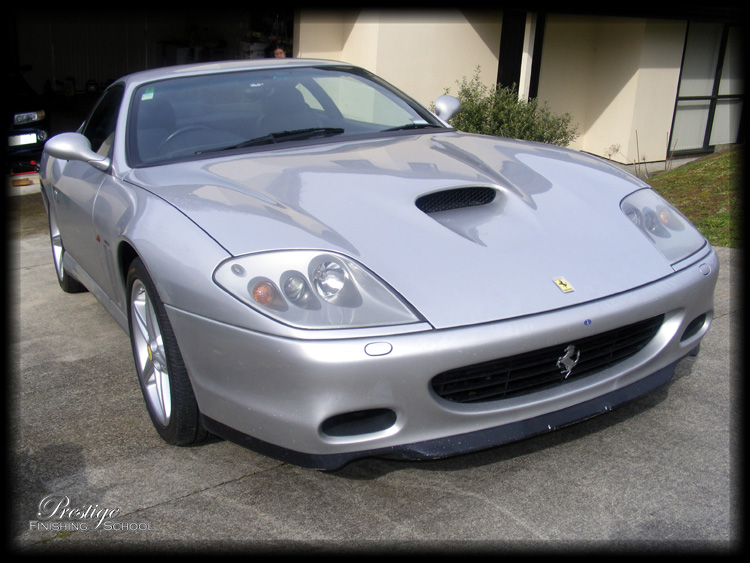
This Ferrari 575 M Maranello was imported into New Zealand from Italy “brand new” in 2003, and the current owner has been its guardian for most of this year. It is fitted with a Sequential Manual Transmission (commonly referred to as an “F1 gearbox”). This was the first Ferrari model to mate such a gearbox with a V12 engine.
With this brief history lesson out of the way, let us now take a closer look at our latest ‘student’.
Enrolment:
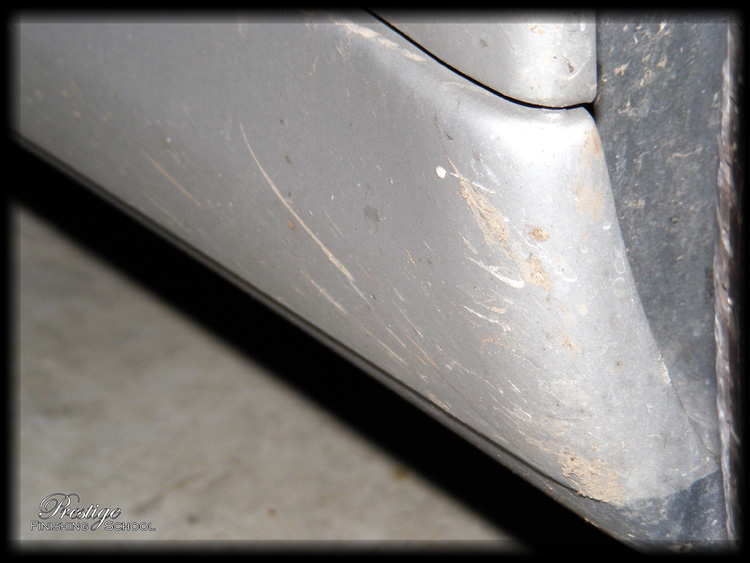
This was the condition of the ‘Prancing Horse’ on arrival. We promise to keep the equestrian metaphors to a minimum, but clearly this specimen had been "ridden hard and put away wet"!
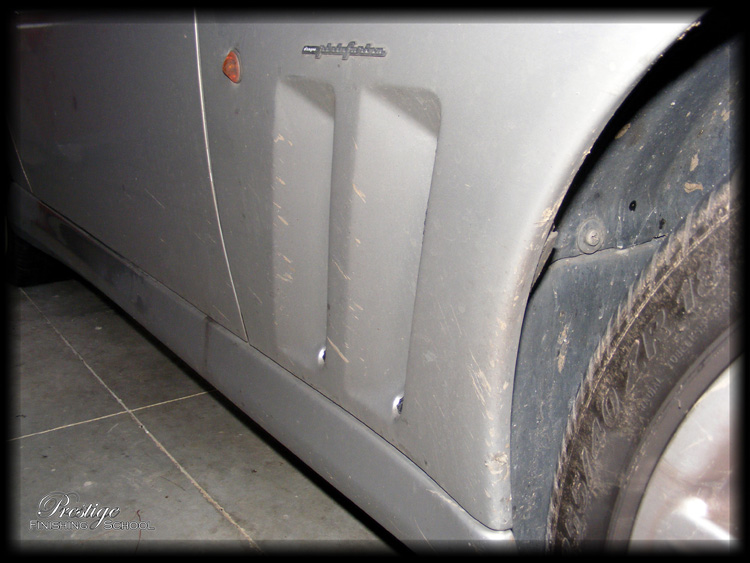

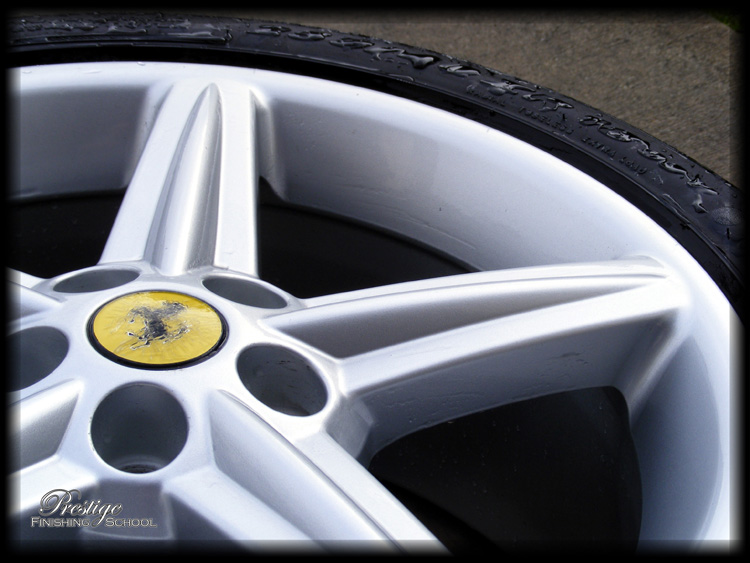
The wheel rims appeared to be in especially poor condition…
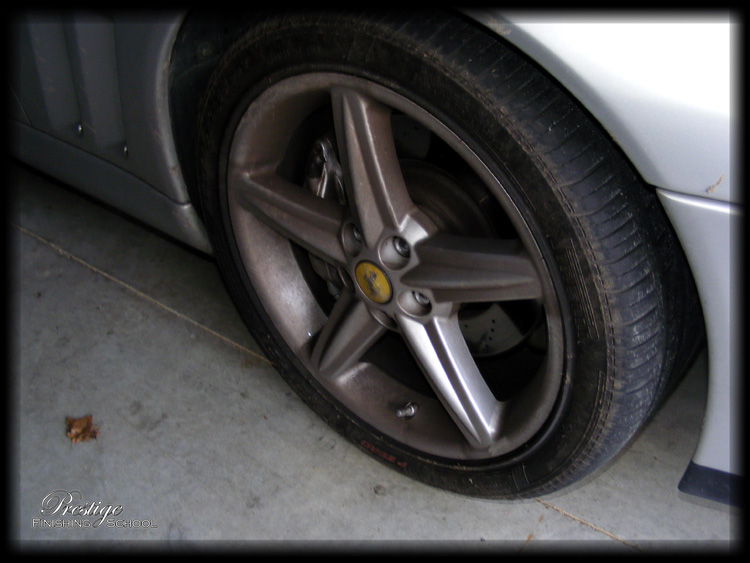
...with a nice collection of bonded brake dust and tar.

Although it looks bad, most of the problems suffered appear to be simply 'dirt' rather than defects in the paint.
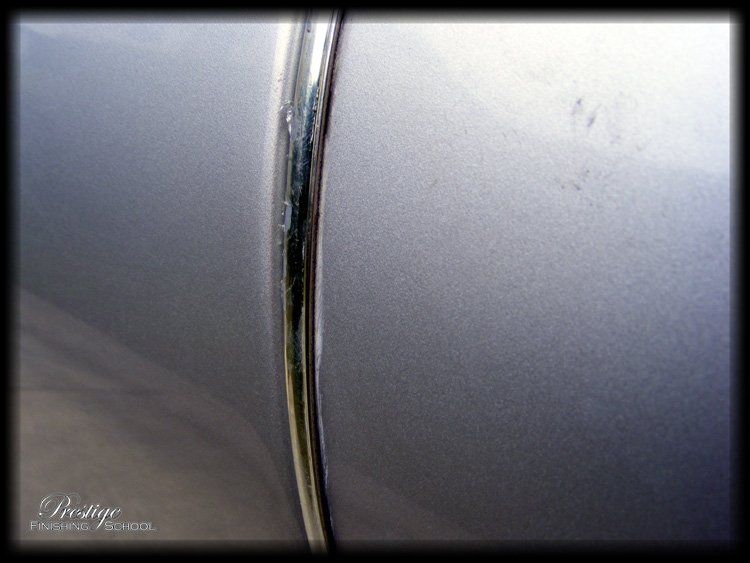
And someone has kindly left some wax behind to help with the detail :)
Remedial Tutelage:
The first step in resolving any kind of deep seated blemish is always to wash away the exterior dirt and grime. While this is a relatively simple and straightforward exercise, it is the process that is most frequently done incorrectly. As a result, poor ‘wash technique’ is the primary cause of paint defects such as scratches and swirl marks. As we provide a comprehensive wash stage as part of our ‘Correction Details’, the various stages are detailed below.
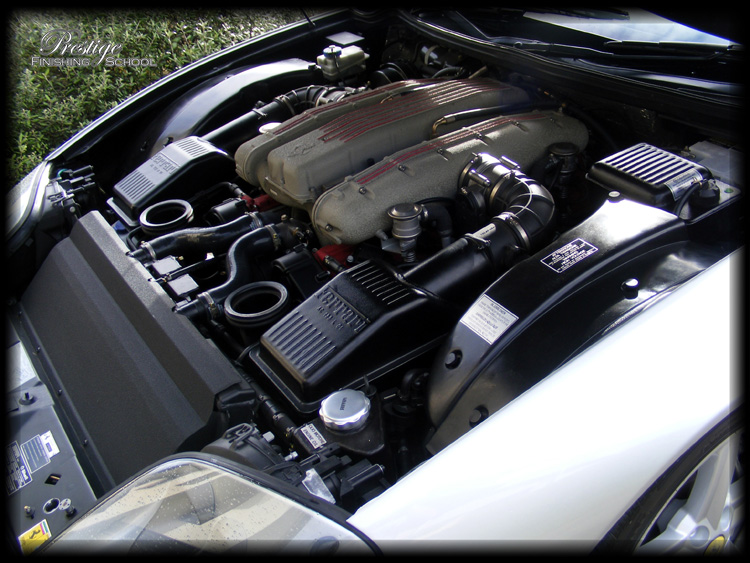
Engine Bay
To begin, the engine bay is detailed. On arrival, it was in relatively good shape…
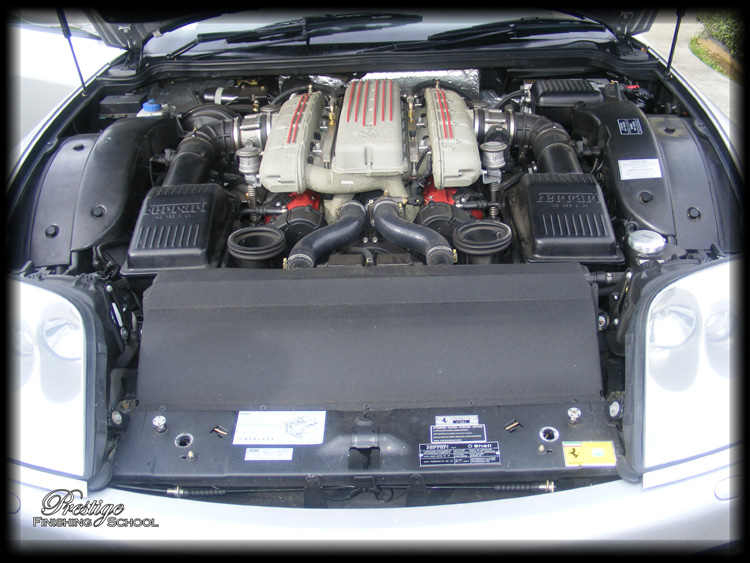
…with only a light dusting of dirt over most surfaces.
This was 'wiped' clean with Meguiars APC rather than 'wet washed' and plastics protected and dressed with 303 Aerospace Protectant.
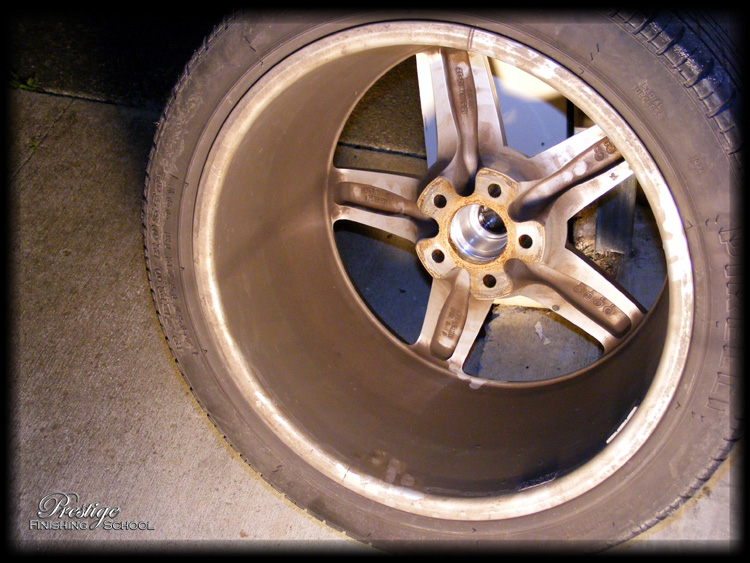
Wheels & Arches
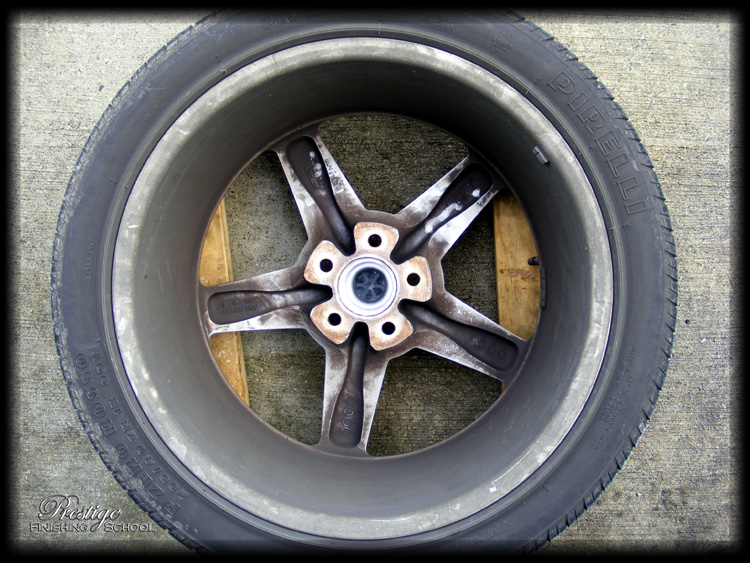
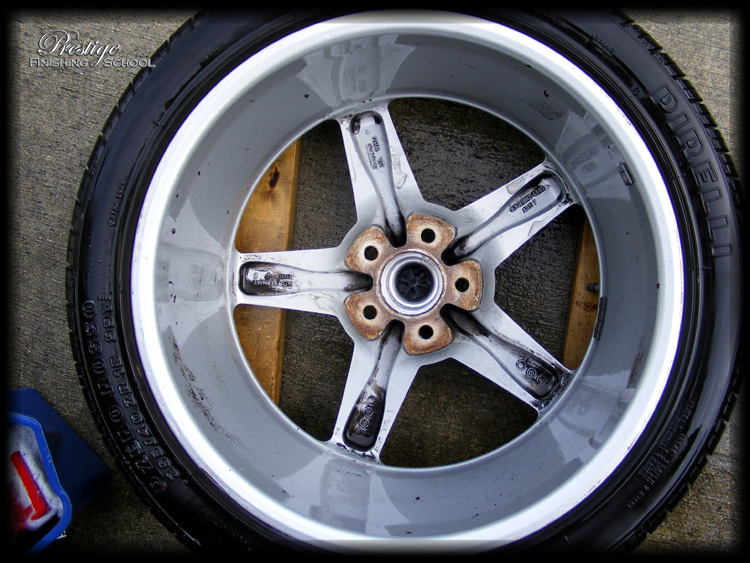
The wheels on this vehicle were really letting the car down in terms of appearance. They warranted removal from the vehicle and a comprehensive clean! By the time the sun had set on Friday night, we were well underway with the rear wheels.
This was the state of the wheel straight off the car:
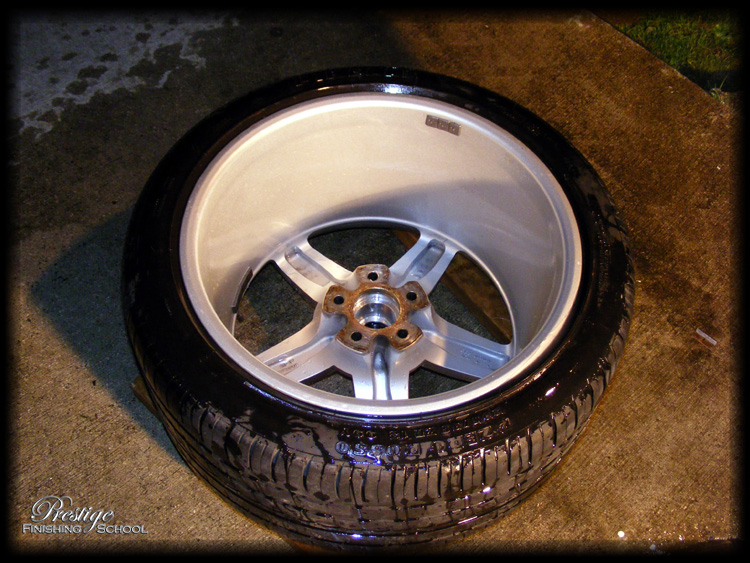
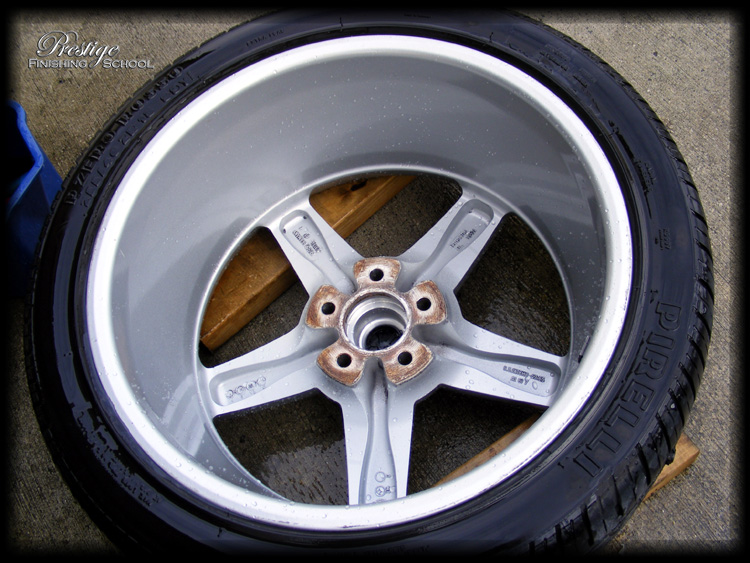
And here is the same wheel after a thorough cleaning and scrubbing with Meguiars NXT shampoo.
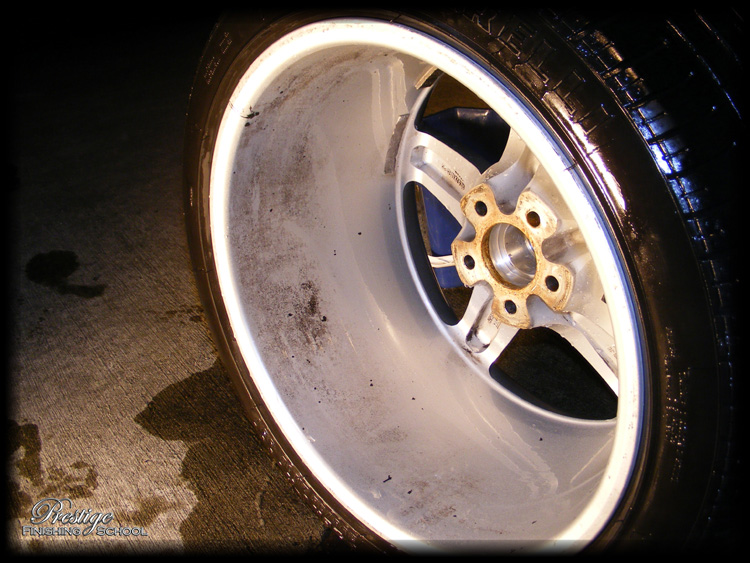
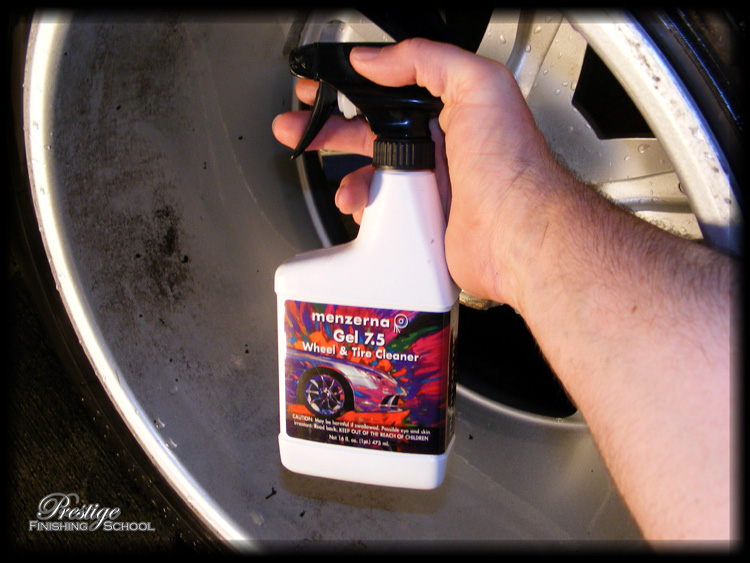
To fully clean the leftover tar and etching that the brake dust had left on the inner rims, we used Menzerna Wheel Gel 7.5 from Germany. This product is ph neutral and completely safe for all wheel surfaces.
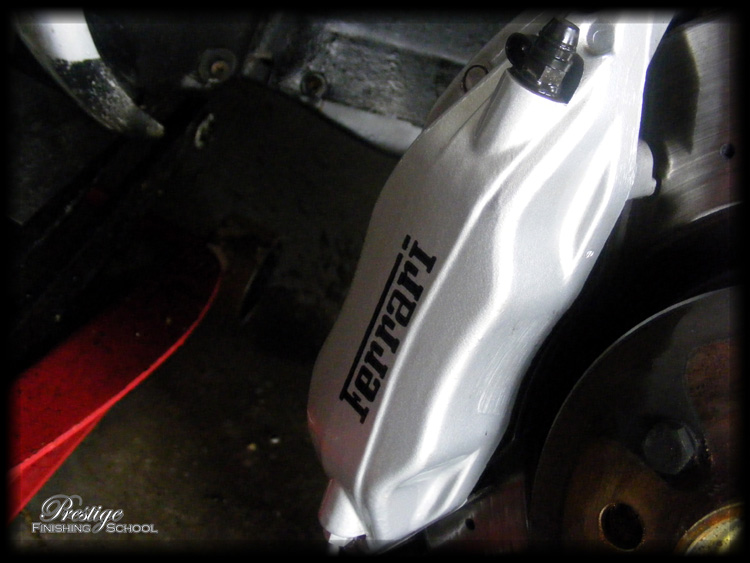
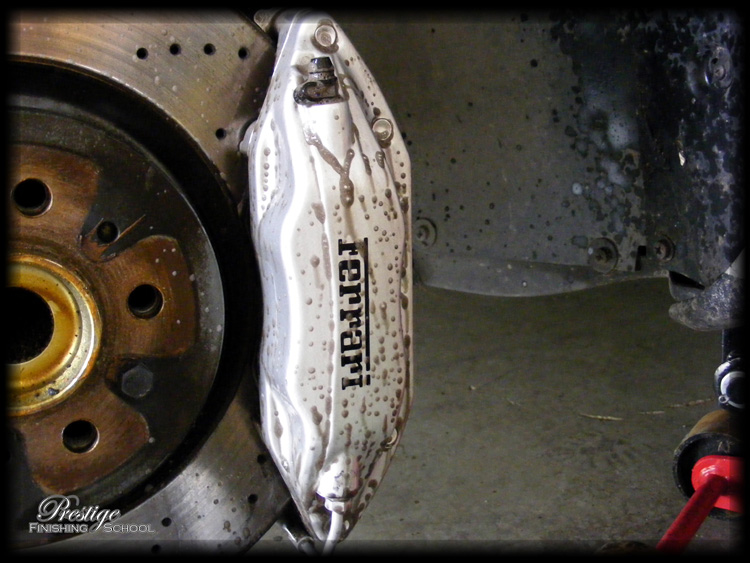
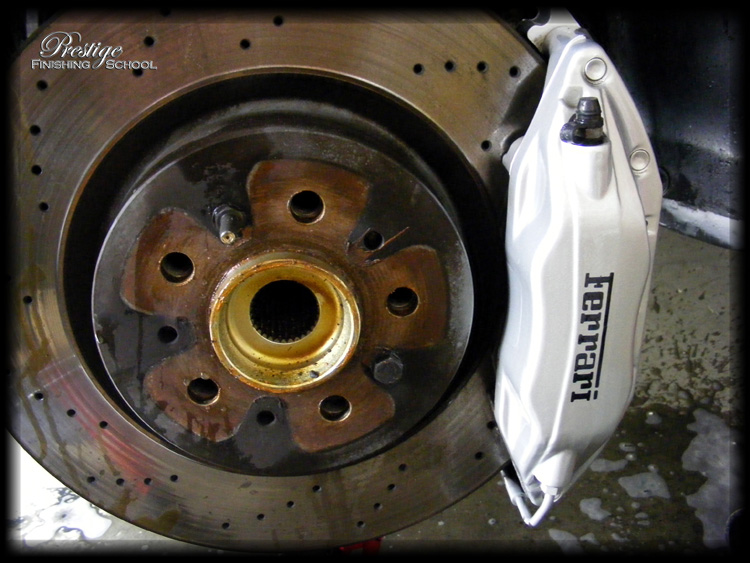
Having the wheel off also gives us the opportunity to completely clean the brake calipers.
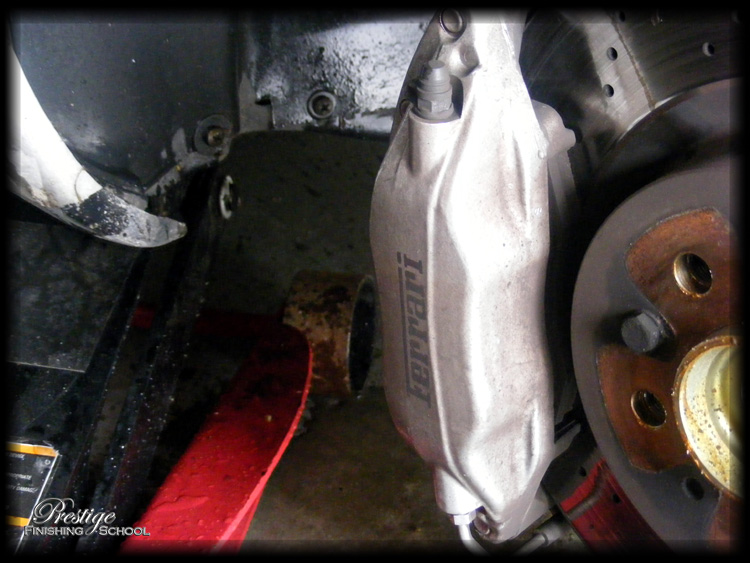
Menzerna 7.5 was used again for this application.
Bright and early on Saturday morning, we resumed with the front rims.
Clean!
And front wheel wells. Notice the grime on the black arch liners. This was scrubbed clean with Meguiars All Purpose Cleaner.
This gave excellent results.
Of course, the front of each wheel didn't get missed either, though the process was much easier with a gentle shampoo being all that was required.
Then each wheel was protected with a coat of Poorboy’s Wheel Sealant…
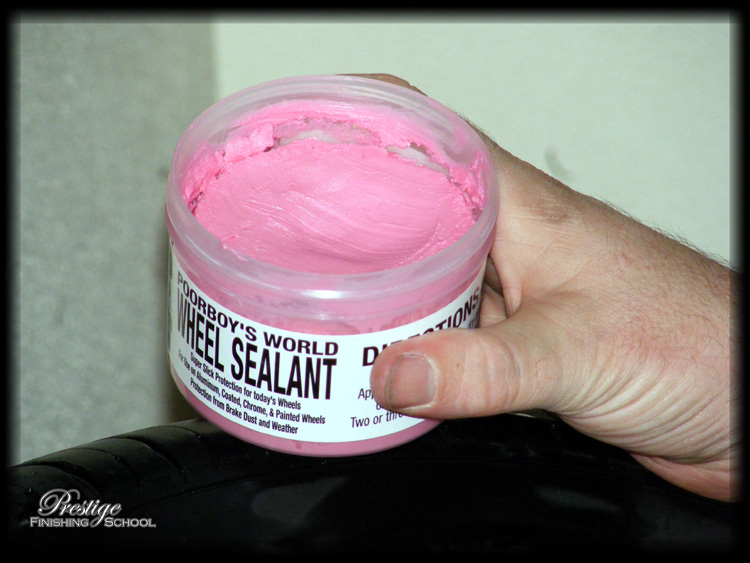
…inside and out.
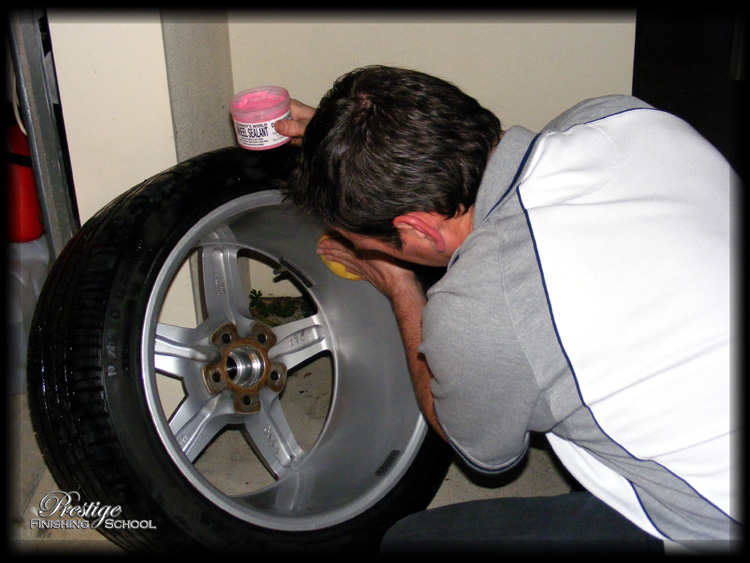
This provides a layer of protection for the rims much like wax on paint, and ensures that future cleaning involves much less effort!
Grilles, Vents & Badges
Next up, each of the various vents and badges around the vehicle were thoroughly cleaned with All Purpose Cleaner and a Meguiars 'Slide Lock' detailing brush.
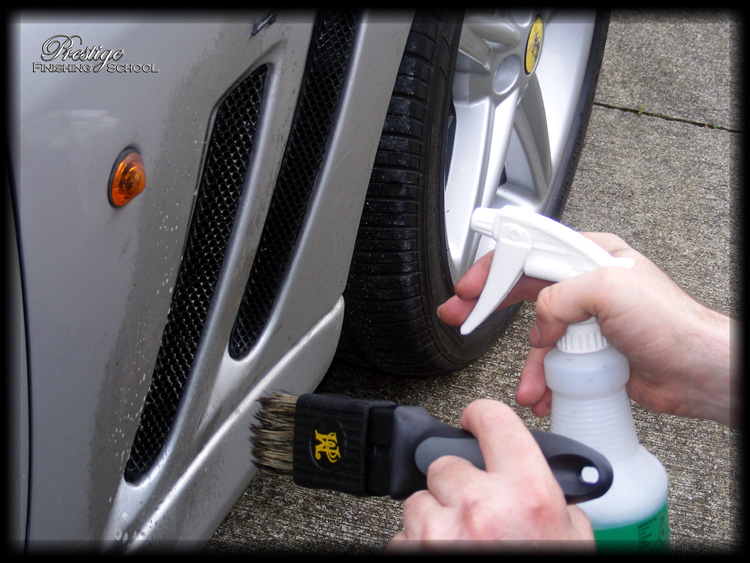
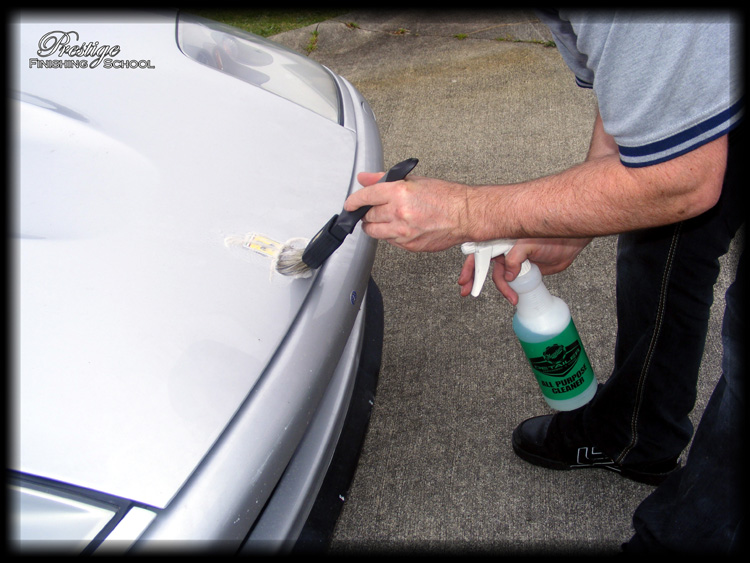
…and grilles that a regular wash mitt wouldn’t reach.
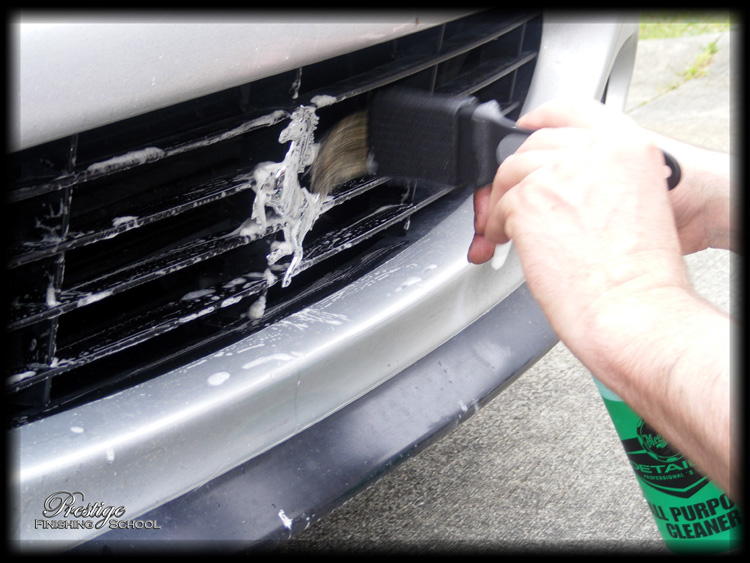
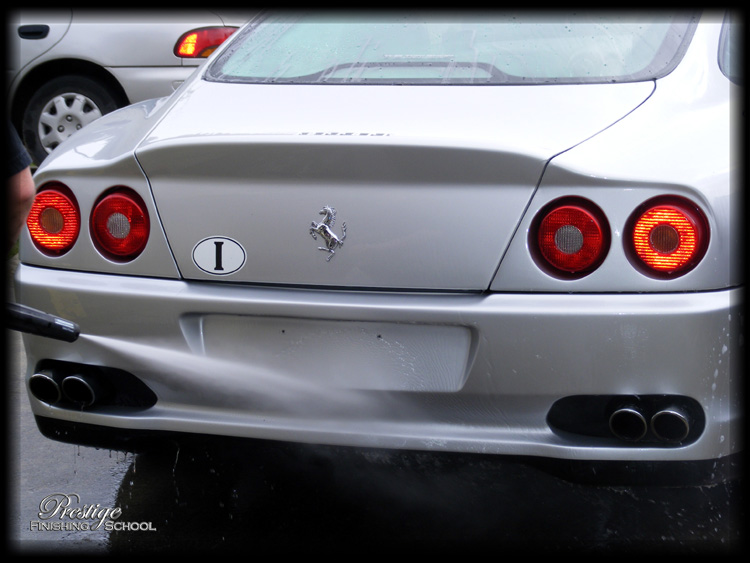
And finally, the vehicle’s body work is rinsed off at high pressure to clean off any loose dirt and grime.
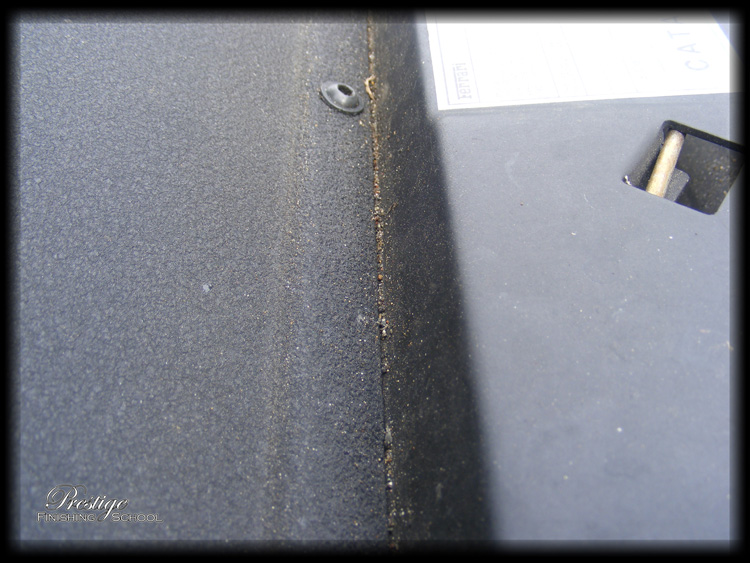
The paint may well look clean after this, but notice the color difference in the paint around the prancing horse emblem on the boot where the APC has been worked in… There is still plenty of dirt left to remove!
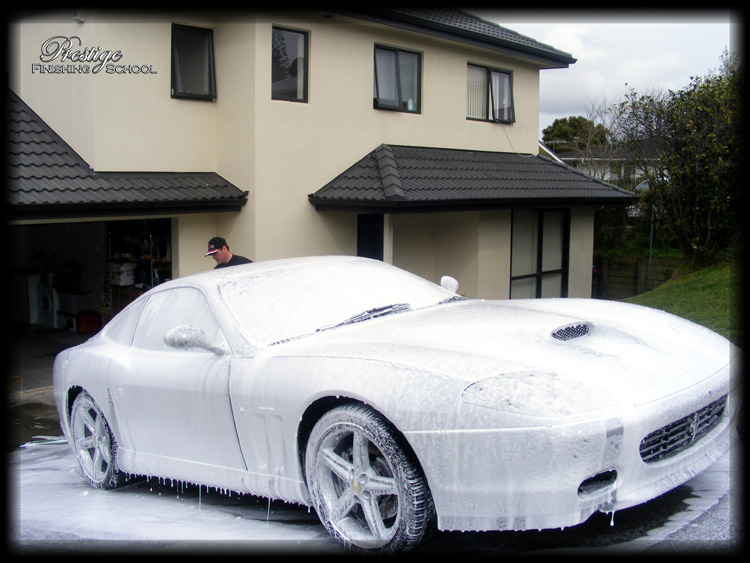
Foam Bath
The vehicle was next treated to a bath of Meguiars Hyperwash Shampoo applied via an AutobriteUK Foam Lance. Hyperwash has an incredible 400:1 dilution ratio and a tiny amount produces large quantities of very thick, clinging foam.
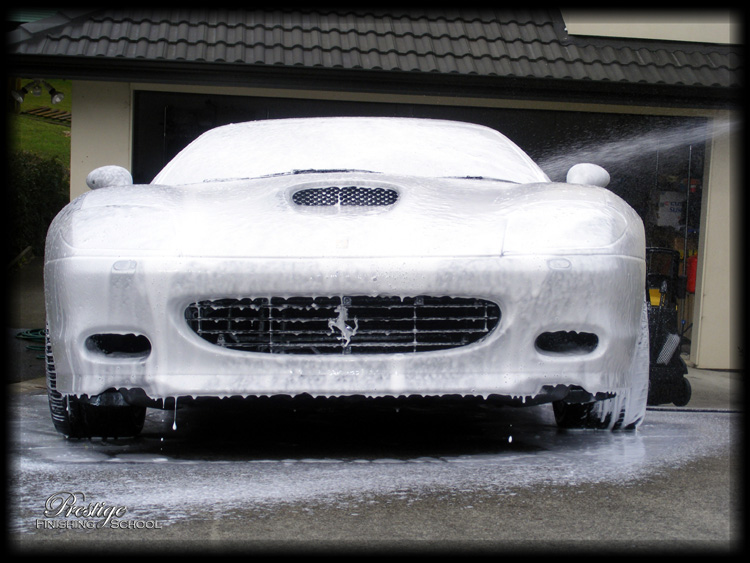
The foam was left to dwell on the vehicle for 5min which gives it an opportunity to dissolve the grime and loosen it from the vehicle’s surface.
And then rinsed clean.
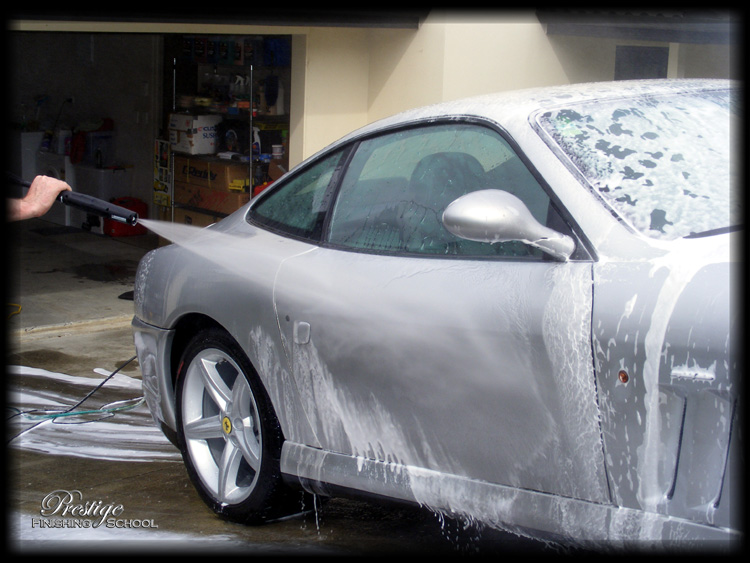
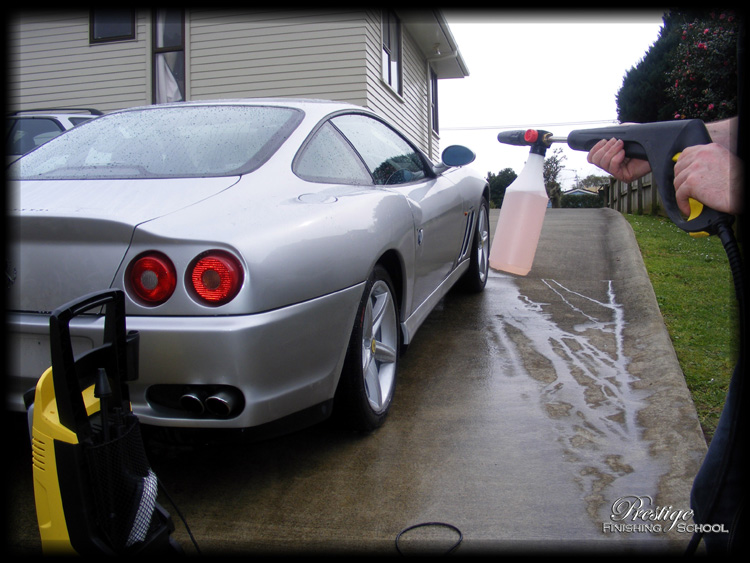
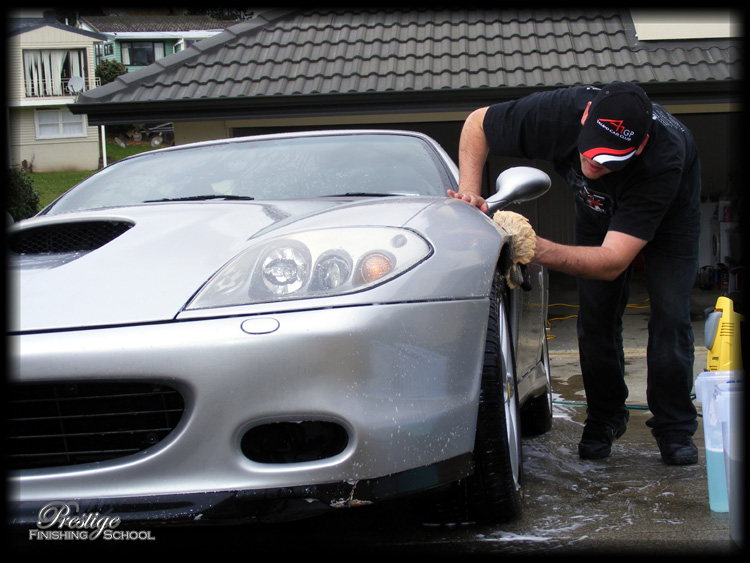
Hand Wash
With as much dirt as possible removed from the paintwork without direct contact, it was time to complete the wash process with a hand-wash via a Lambswool Mitt and Meguiars Shampoo Plus.
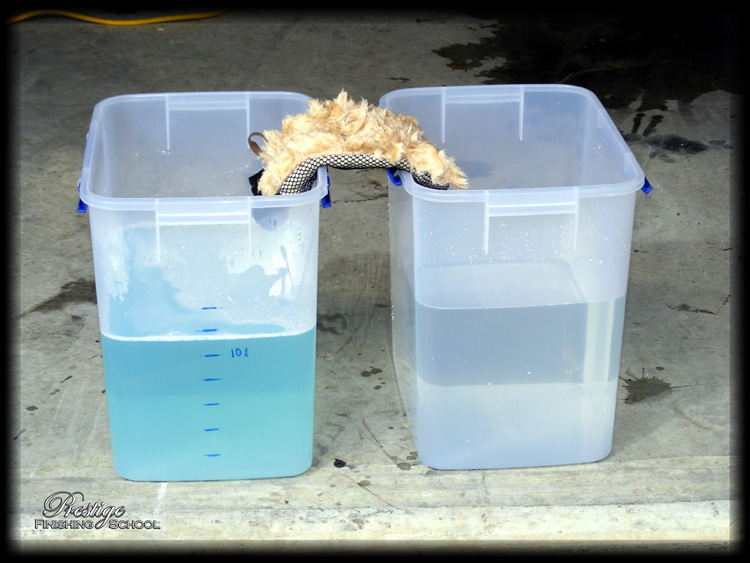
A lambswool (or microfibre) mitt should always be used for 'contact' washing of a vehicle's painted surfaces. Particles of grit and dirt on the paint are the primary cause of swirls on modern vehicles with 'clear coat' paint. Regular sponges cause the grit to be trapped against the surface of the paint and dragged across it. (Even worse still are the brushes at self-service or automatic carwashes.) The plush mitt however will draw the dirt away from the paint surface, deep into the fibers of the wool, thus preventing it from inflicting further damage.
Also notice the separate buckets for 'wash' and 'rinse' action. This is the safest and most effective way to clean a vehicle's paint. The Mitt is soaked in the 60° C Shampoo Plus solution which has a "Low-Suds / High-Lubricity" formula and then worked over the vehicle. After each panel, the Mitt is cleaned off in the 'rinse' bucket, dislodging any dirt picked up off the car, before being re-soaked in the shampoo.
If you consider the use of two buckets 'overkill', look at the state of the rinse bucket after completing the wash.
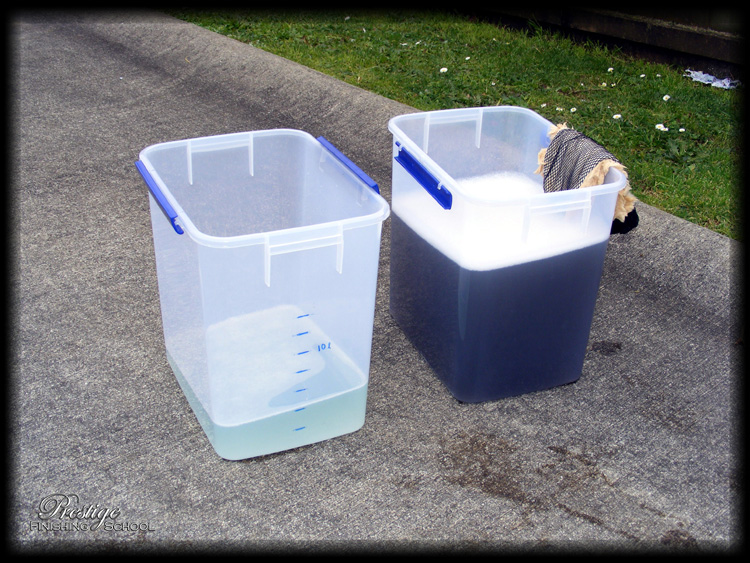
Would you consider wiping your car with anything soaked in the bucket on the right?
Clay Treatment
The final step in ensuring a perfectly clean paint surface is the removal of bonded contaminants with a detailing clay bar. This process can remove tar spots, tree sap or industrial fallout, all of which contribute to making the paint surface rough to the touch and dull to look at. In this instance, a Meguiars 'Mild Detailing Clay' bar was used with Meguiars Last Touch (diluted 1:1) as lubrication.
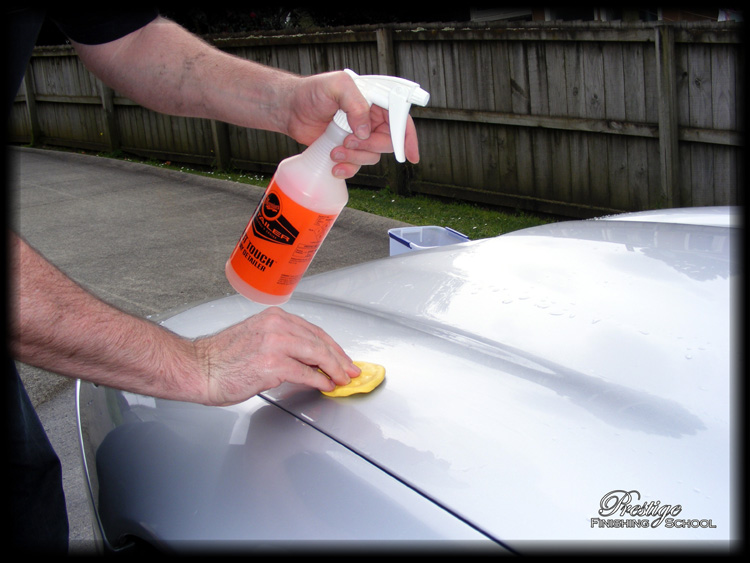
This particular car was almost completely free of bonded material, with an almost perfectly smooth feel to it after washing off the surface dirt. Accordingly, the 'Mild' bar was all that was necessary.
And as you can see, very little contamination was removed from the paint.
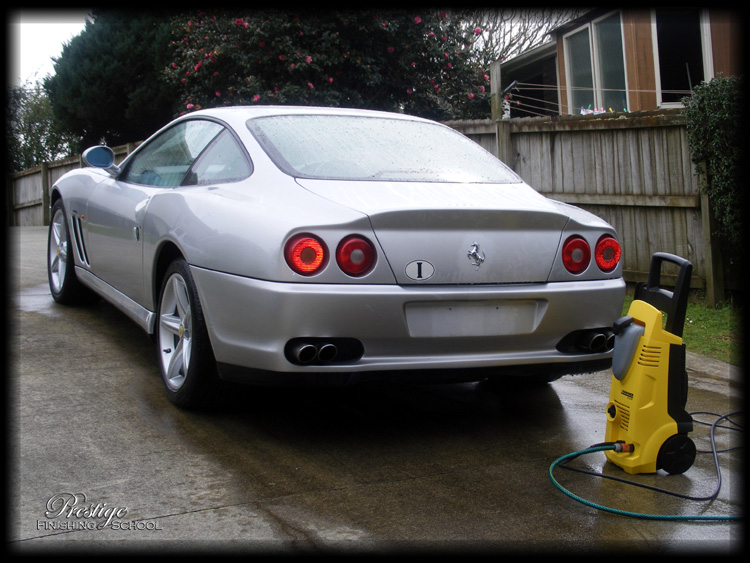
The vehicle was then given a final rinse off with the pressure washer…
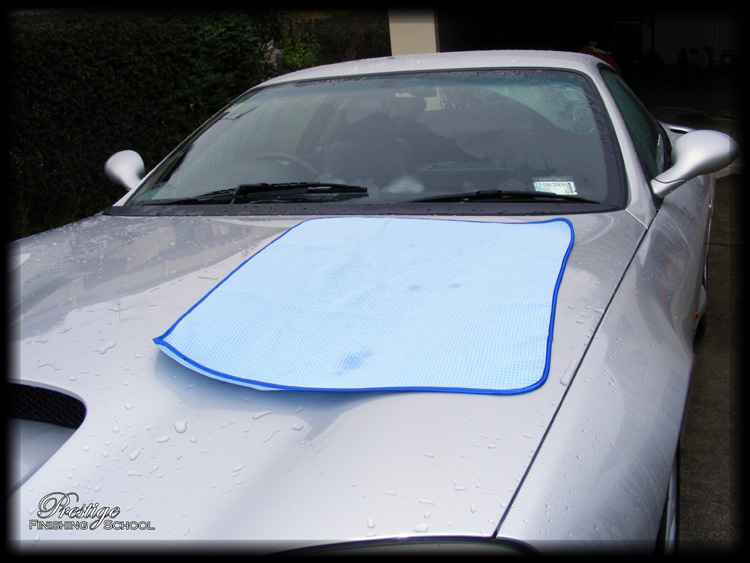
…and then patted dry with a Sonus Der Wonder Microfibre Drying Towel.
The 'Der Wonder' really is in a different league to the myriad of other drying solutions that we've tried. Two of these will completely dry a large vehicle without any need for wringing out excess water and to top it off, they're the softest and safest towels we've encountered for removing water without inflicting scratches in the paint.
With the vehicle's exterior now in a perfectly clean and dry state, it was moved inside to begin a thorough examination of the condition of the paint and to determine the best method of correction to produce a perfect finish.