BMW 525i M-Sport (Part 2)
Initial Assessment
From the outset, it was evident that significant paint correction would be required for this vehicle, with swirl marks and random deeper scratches present on many of the painted surfaces. As the correction process essentially involves ‘removing’ a microscopic layer of the top coat of the paint, a thorough examination of each panel is necessary, paying particular attention to the thickness of the paint present.
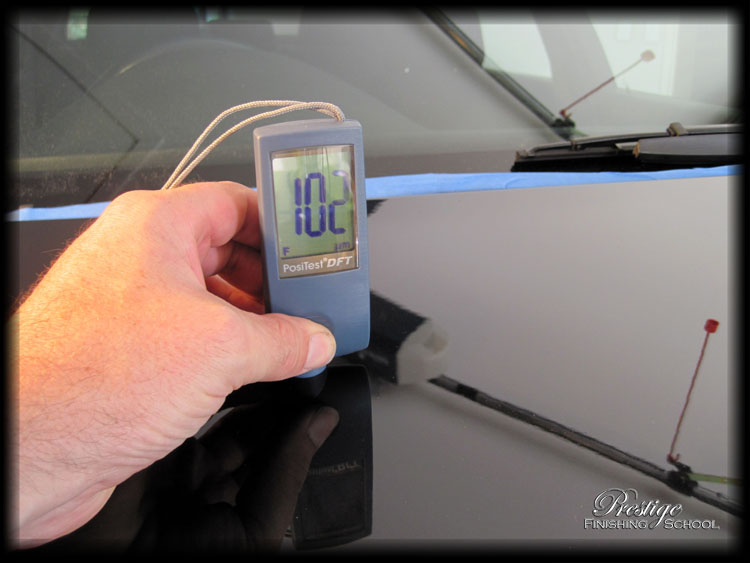
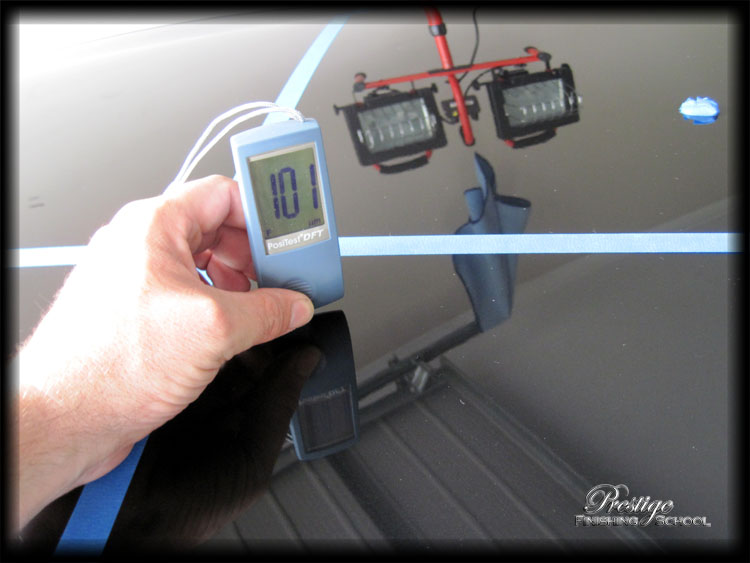
The "PosiTest DFT Combo" gauge from DeFelsko is an invaluable tool for this purpose. It will quickly and accurately (to the nearest micron (µm) which is 1/1000th of a millimeter) measure the thickness of a coating on any ferrous (eg. steel) or non-ferrous (eg. aluminium) surface.
Having knowledge of the relative thickness of the paint is a fundamentally important factor when undertaking any form of paint correction. Both in terms of understanding the amount of ‘working material’ that you have to begin with, and throughout the correction process to gauge the effect that different polishes have on the vehicle’s paint and ensure that only ‘safe’ amounts of the top layer of clear coat are removed.
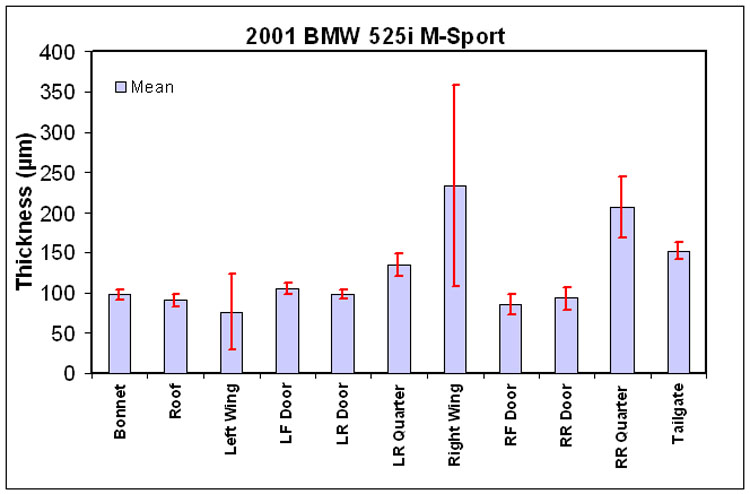
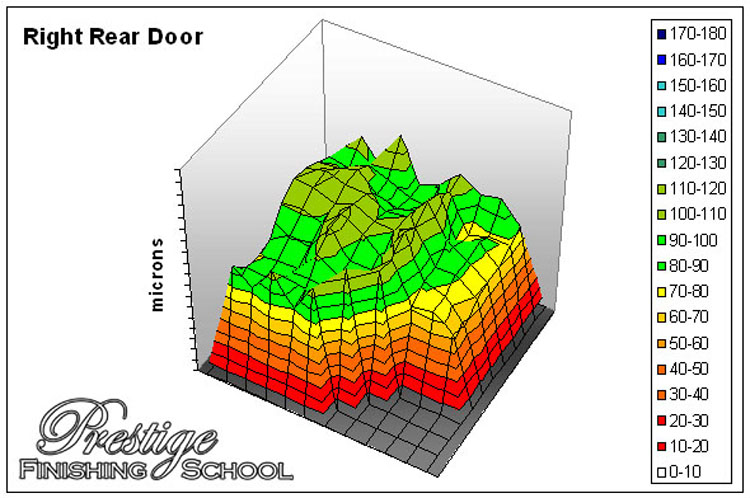
Each panel was carefully assessed to highlight any localised ‘thick’ or ‘thin’ areas that might represent previous touch-up work, or aggressive cutting in a localised area.
This vehicle had healthy paint readings across the board – with evidence of touch-up work having performed on the right front & right rear corners.
Course of Correction
This section details the paint correction process for each panel..
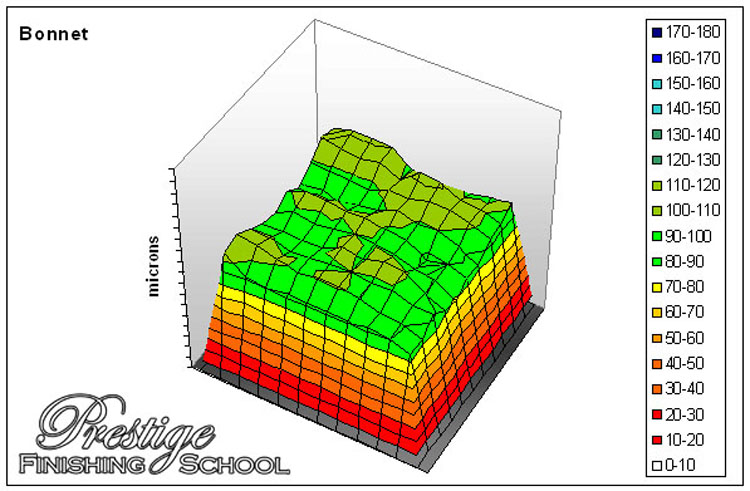
Bonnet
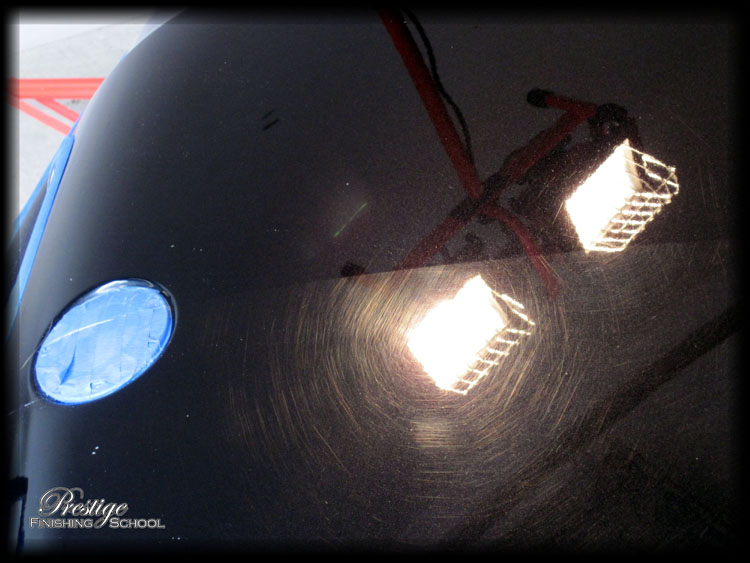
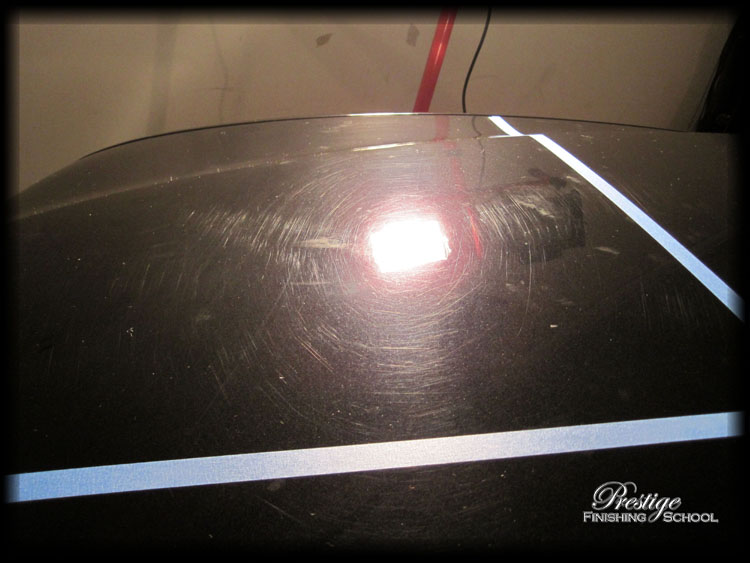
To begin, we need to establish the correct polishing compound, pad and technique combination required to achieve the desired level of correction for this vehicle’s paint. It is important in all cases to approach this exercise from the 'least aggressive' option, and step up the cutting level, machine speed, and pad type as required. This ensures that the paint defects are corrected with the smallest possible amount of paint being removed from the vehicle.
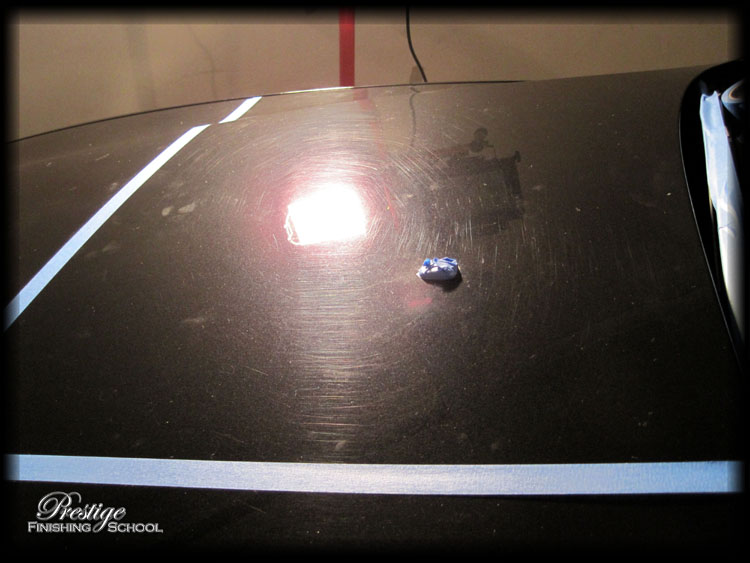
This was the condition of our 'test' area prior to starting. Paint thickness (as illustrated in the following diagram) was consistent across the panel, and averaged a fraction under 100 µm in total thickness. BMW paint has a reputation for being "rock hard" and this specimen turned out to be no exception! We quickly graduated from finishing polishes to Menzerna 106FA on a 3M polishing pad which has a bit more 'cut', but this wasn’t touching the defects. Eventually we settled on Menzerna "Power Finish" PO85 RD 3.02 on a 3M compounding pad.
PO 85 RD 3.02 was initially developed for removing more severe paint defects and 2000 grit sanding marks from the cerami-coat finish of modern Mercedes paints. It is now being widely used on regular clearcoat finishes and is particularly effective on the harder clear coat finishes found on VAG and BMW paints.
This is the level of correction after a single pass of the RD3.02. Much improved, but some deeper scratches are still evident in the paint.

When employing aggressive polishing compounds, it is vitally important to keep a close eye on the amount of paint being removed. Amazingly, this combination was only just starting to touch the paint!
Reassured, we settled on a course of two 'hits' of the compound, followed by a refining stage with Menzerna 85RD which gives a difference that looks like this:
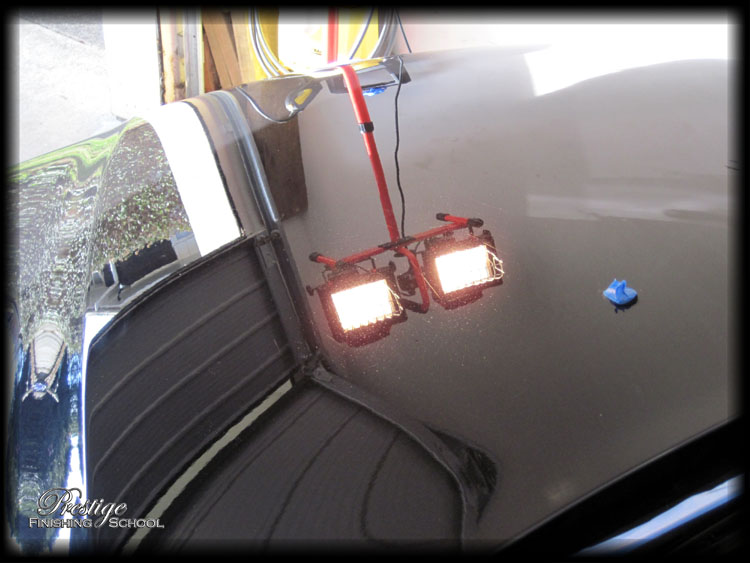
The process is then repeated in sections across the entire panel with the end result showing an enormous improvement in gloss, clarity and reflectivity.
(Please excuse the light smattering of polishing dust in this photo).
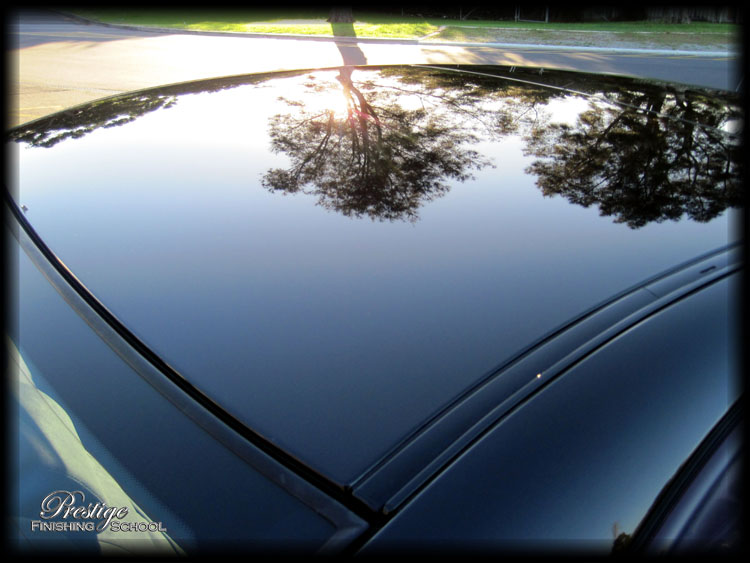
Roof
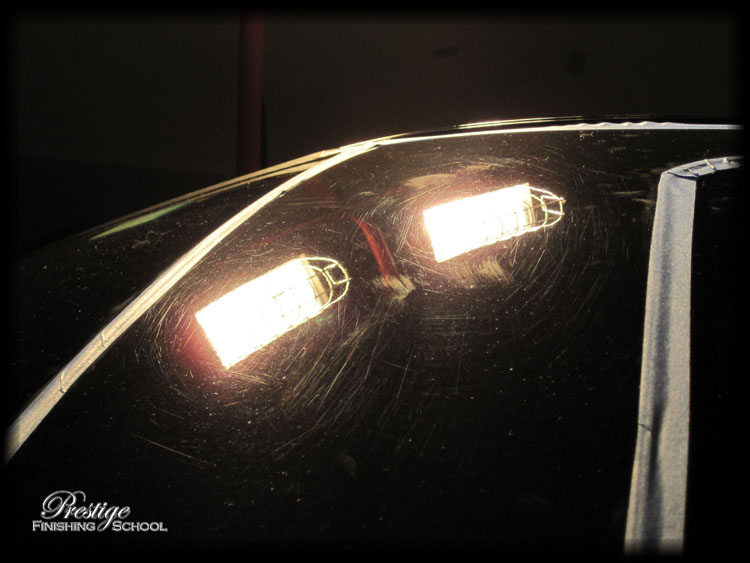
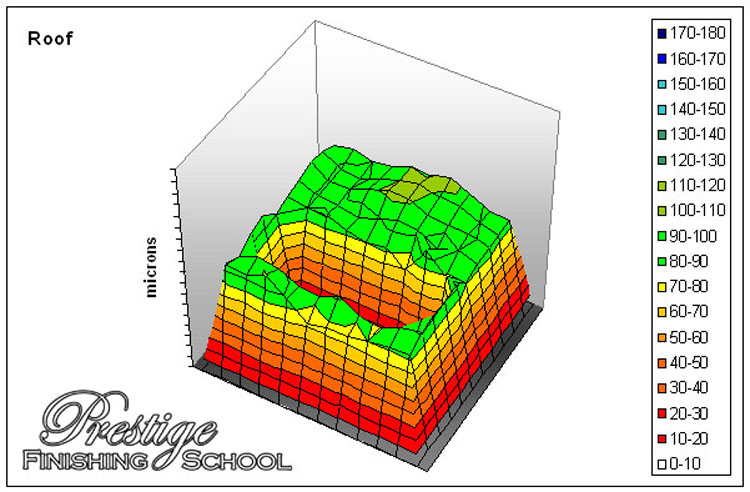
The roof was also showing significant marring with some reasonably deep scratches as well.
(The gap in the middle of the thickness graph is due to the glass sunroof).
This picture illustrates the 'haze' left by aggressive compounds. This is an example of the 'micro-marring' that requires a follow-up with a refining or finishing polish..
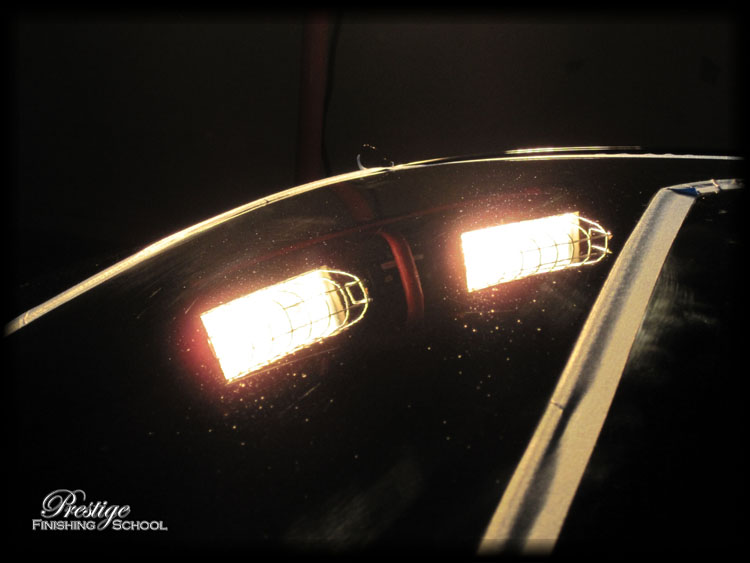
The end result is a ‘crystal clear’ finish, showing incredibly sharp detail.
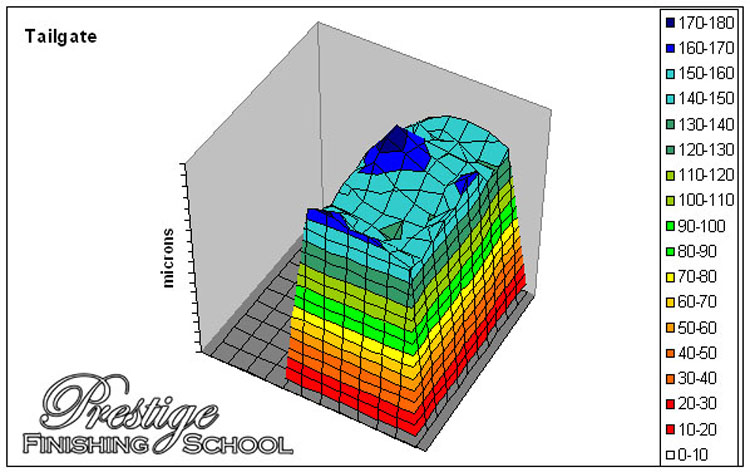
Boot
This panel was another area of particular concern for the owner. Understandably so!
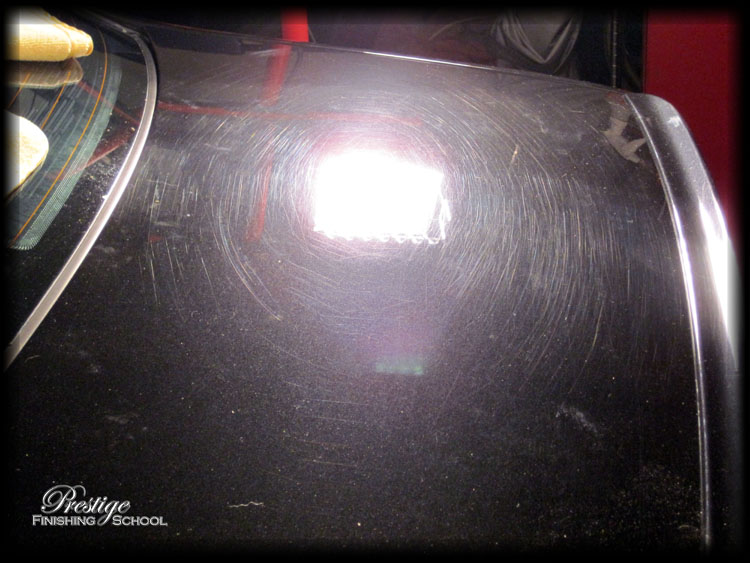
Paint thickness here was a little on the 'high' side, possibly indicating a re-sprayed panel. As such, we started from scratch, working our way up the scale of polishes, just in case this paint was significantly 'softer' than the extremely hard factory finish.
It eventuated that this was factory paint after all, but it is always better to err on the side of caution. (At least, in our opinion.)
The above is another dramatic illustration of just how badly swirl marks can affect the overall appearance of a vehicle. (And the magnitude of the correction that can be achieved.)
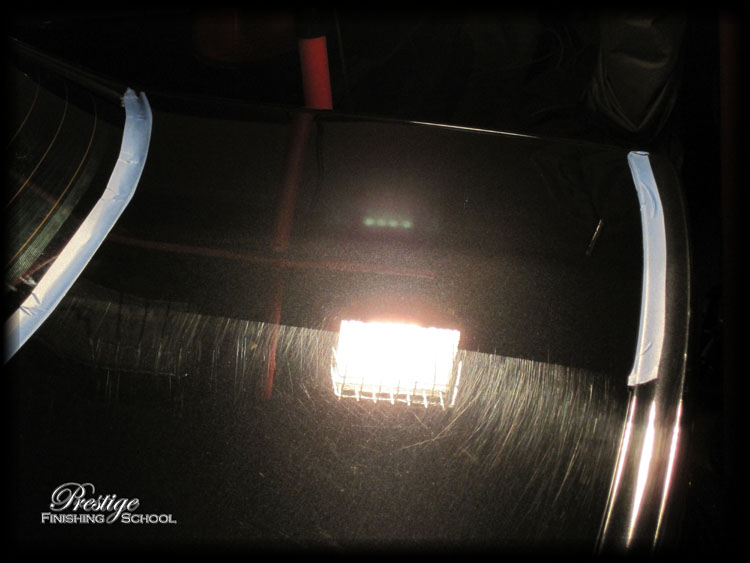
We’ll save the picture of the finished panel for the final showing!
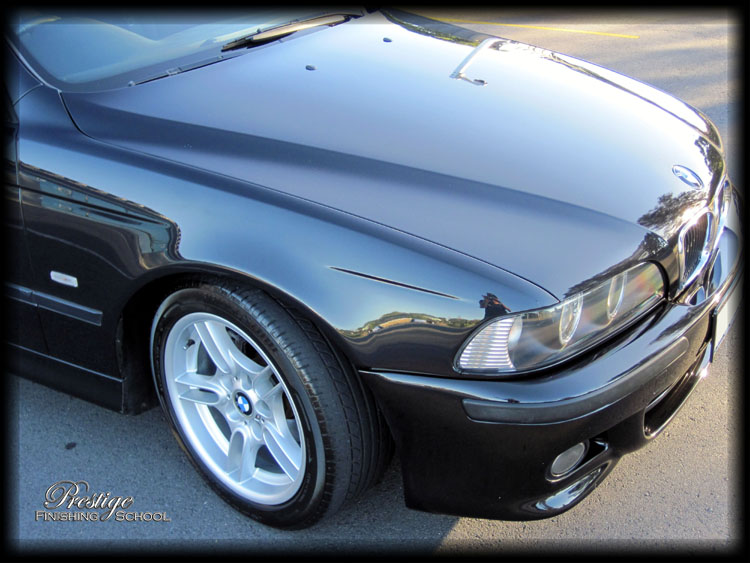
Right Front Wing
This panel had certainly been re-sprayed. Note carefully the 'scale' of the surface measurements in the diagram below and you’ll see that it is roughly double that of the other panels so far. Of greater concern is the marked variance in the paint thickness across the panel.
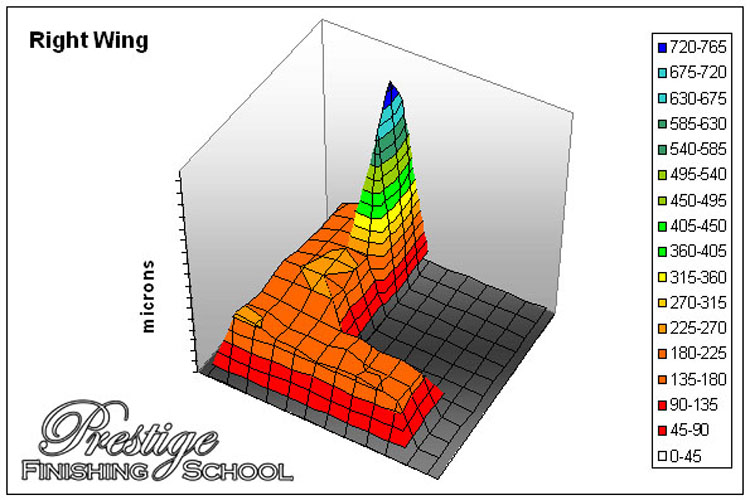
We proceeded with caution… The panel finished perfectly.
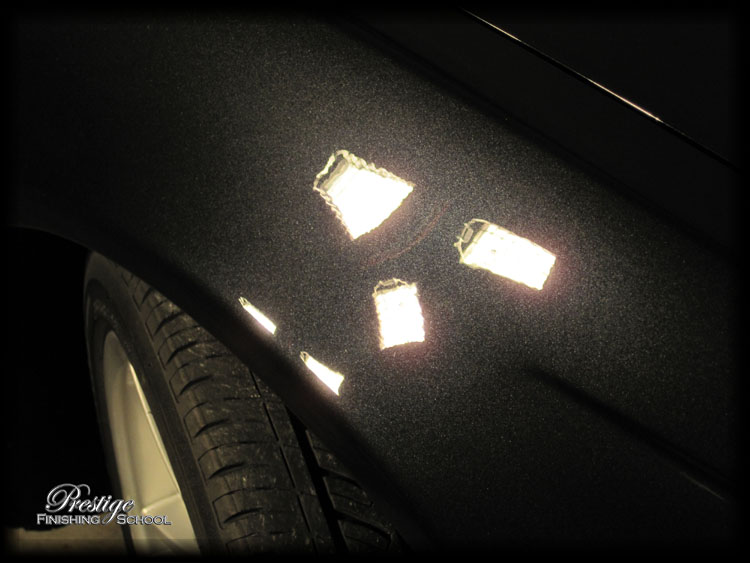
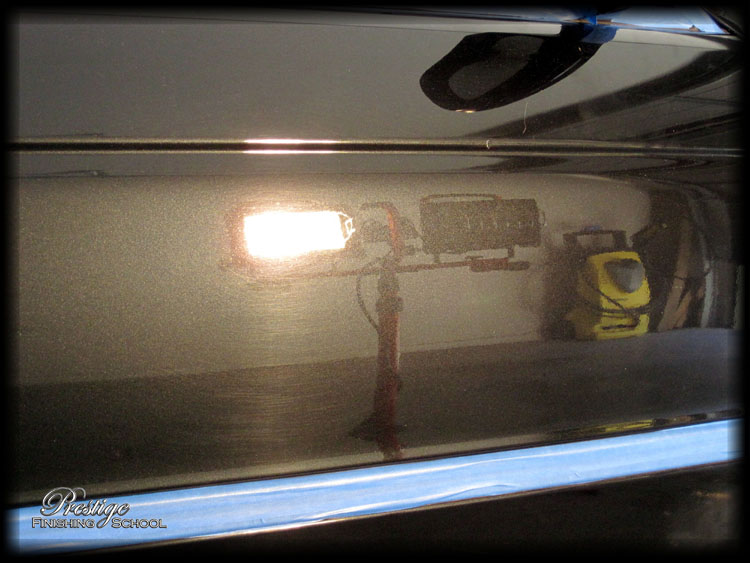
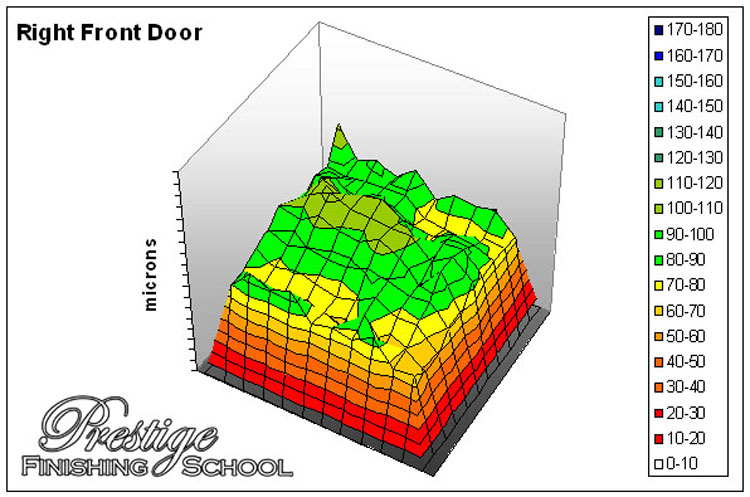
Right Front Door
The only small area of concern with the driver’s door was a 'touched-up' spot on the panel’s crease. Otherwise, minor swirl marks were the order of the day.
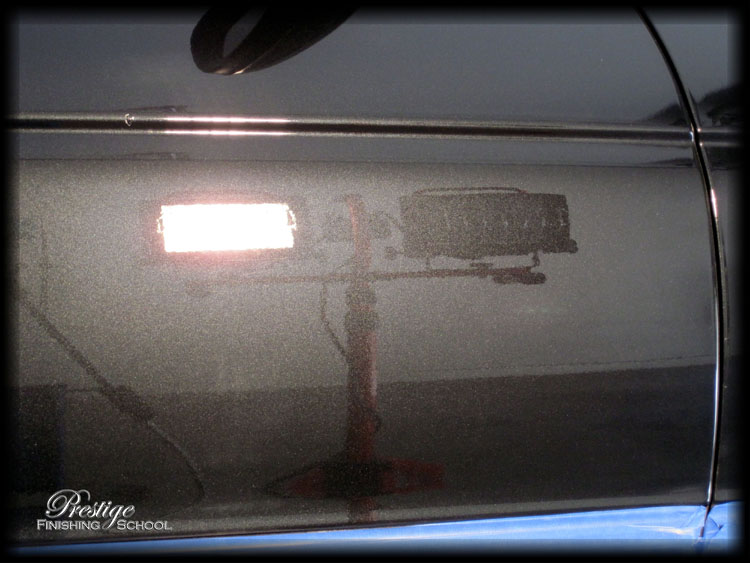
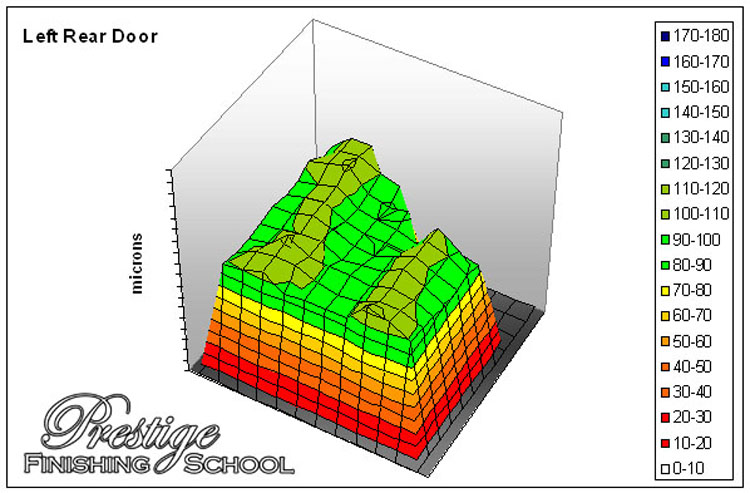
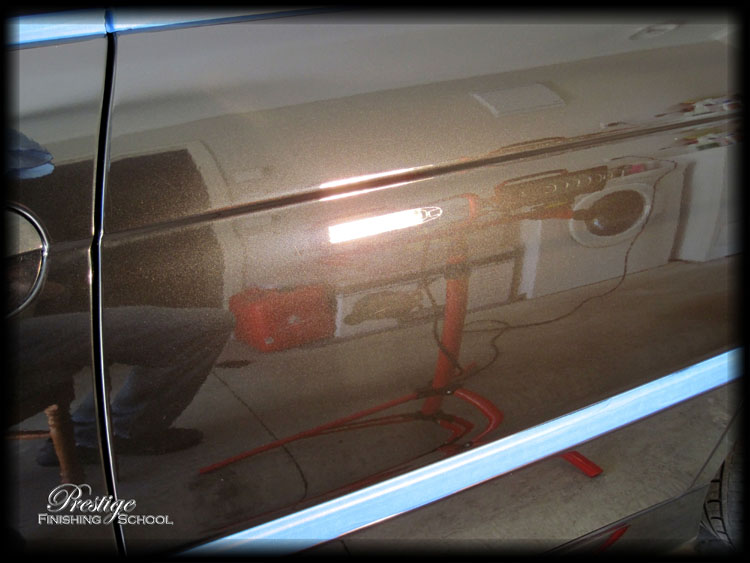
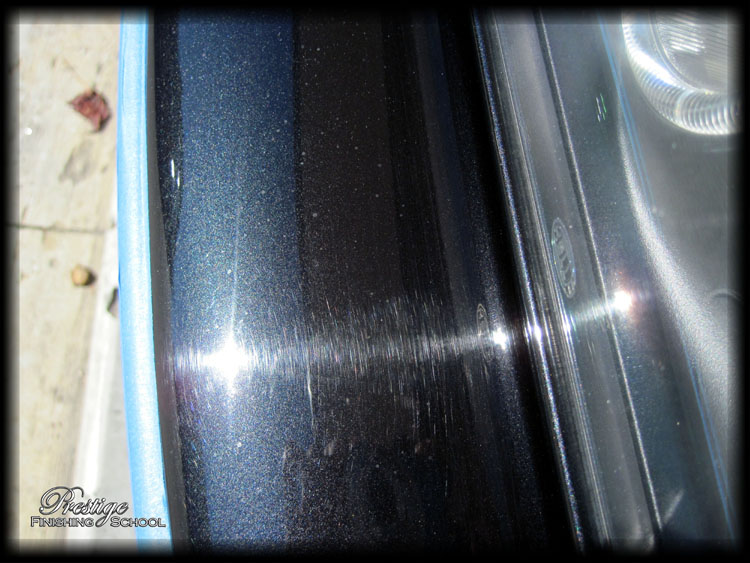
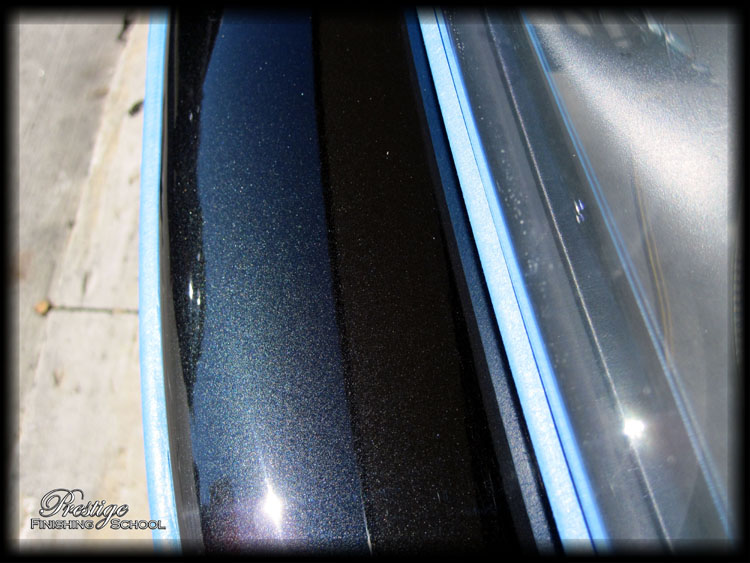
Right Rear Door
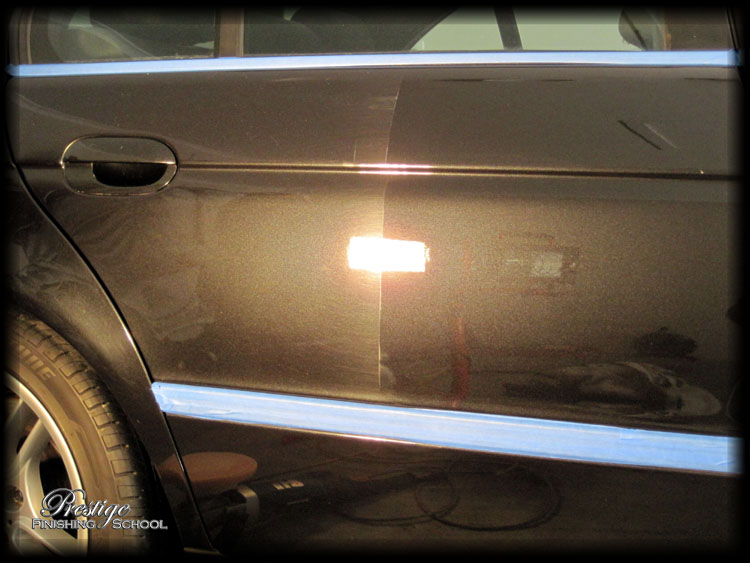
50:50 comparison photos such as the above are the most 'honest' way to demonstrate the improvement in a vehicle’s appearance. While they lack the aesthetic appeal of a 'finished vehicle' shot, they reveal the difference under controlled and (most importantly) consistent lighting. Creative use of light in photography can be used to mask many failings, but showing treated and untreated sections in the same photo removes all possible doubt. For this reason, we try to include as many of these pictures as time permits.
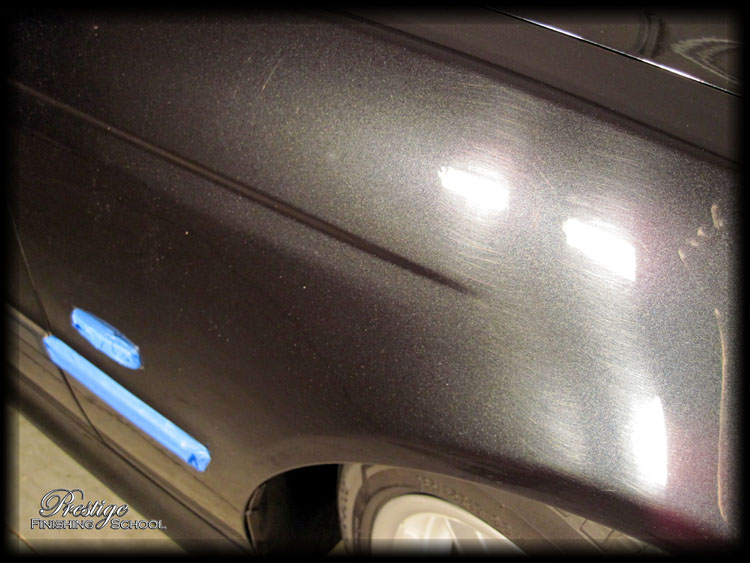
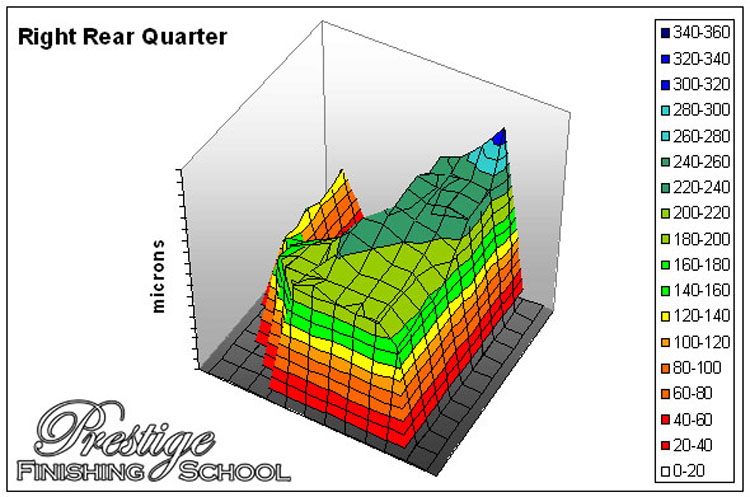
Right Rear Quarter
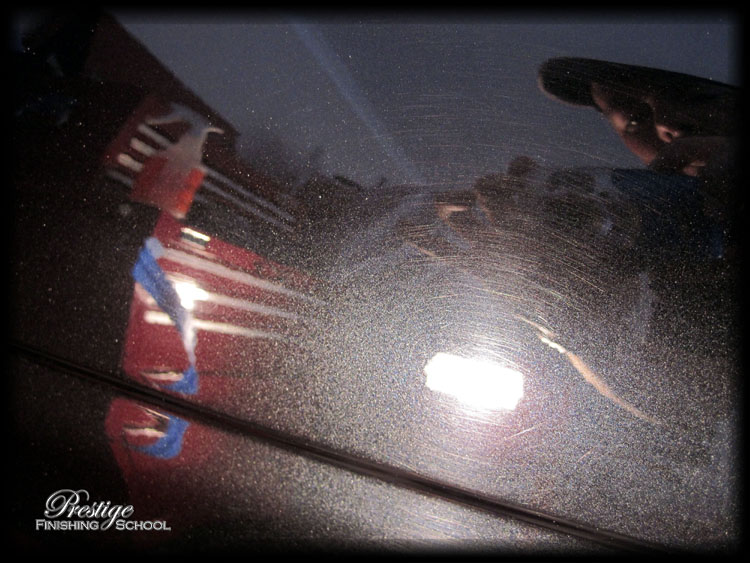
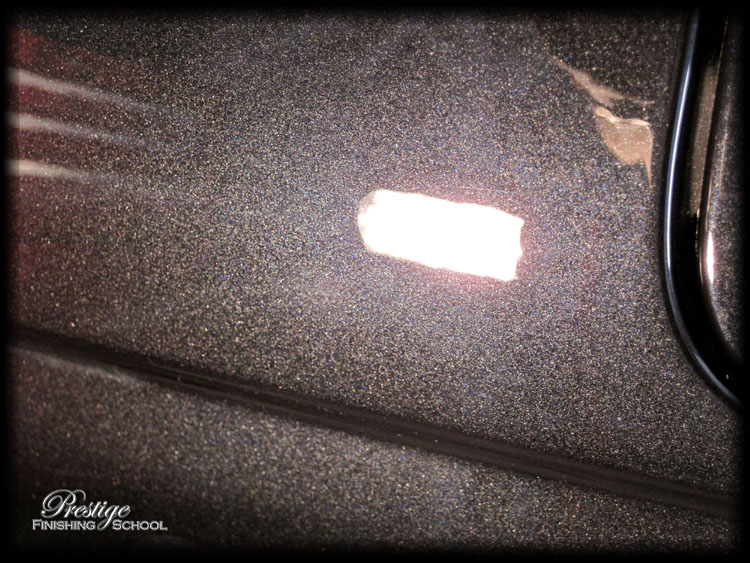
This section had also received some attention in a spray booth. The paint finish was again roughly double, but it seemed to be a quality job, with the new paint blended nicely on the "C Pillar". Close up shots here show how the 'sparkle' of the pearl in the paint is diminished by paint defects.
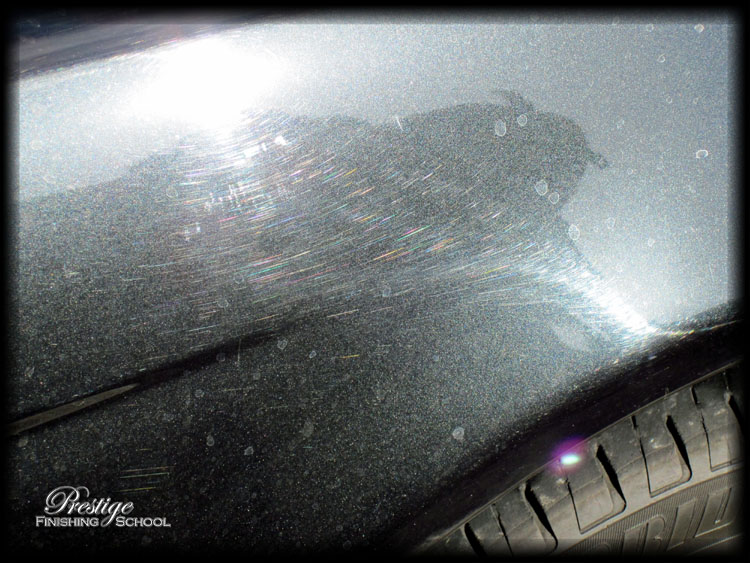
And a post-correction shot. The metallic flake in the paint really comes alive.
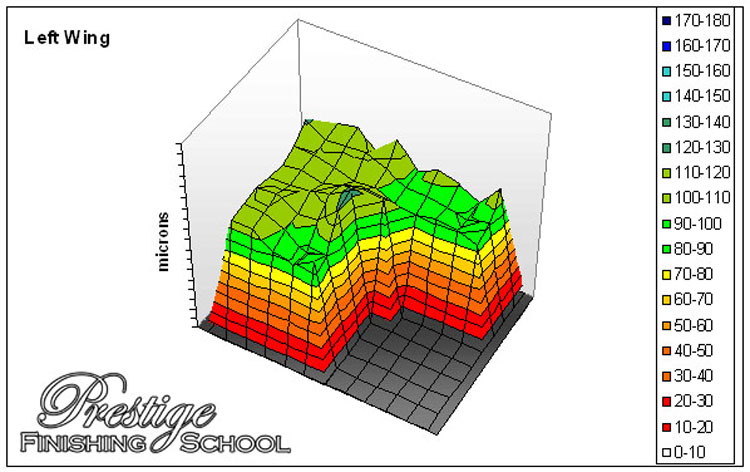
Left Front Wing
The passenger’s side of the vehicle was consistent, hard, uniform factory paint.
Left Front Door
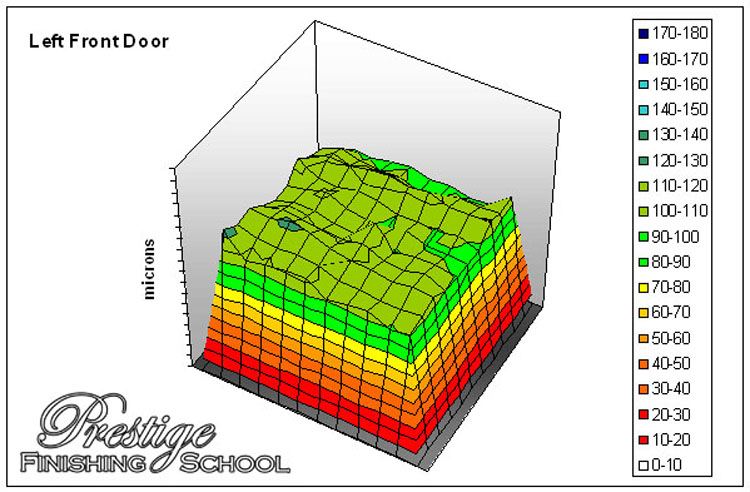
A few hours on these panels revealed a perfect finish.
Left Rear Door
Bumpers
As they are formed from ABS plastic, the front and rear bumpers do not register thickness measurements on the PosiTest gauge. In addition to working 'blind', the plastic panels are much less efficient at dispersing heat generated by the friction of the polishing process than their metal (or alloy) counterparts. For these reasons (in addition to the intricate shapes, vents, etc.) a smaller 3" pad was used with a soft 2.5" backing plate attached to the rotary polisher.
Finishing
Unfortunately, we ran out of time to capture any photos of the finishing process. The final steps in preparing this vehicle were as follows:
Final Showing
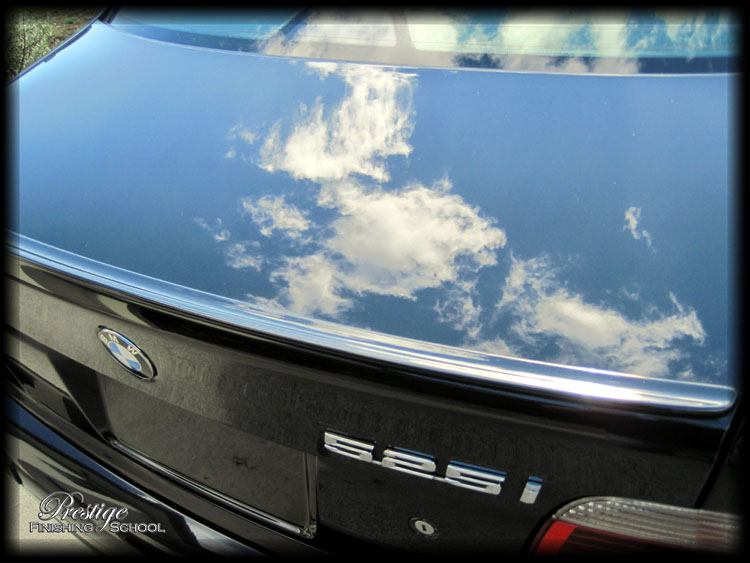
With all the details taken care of, it’s time to show off… remember that boot lid?

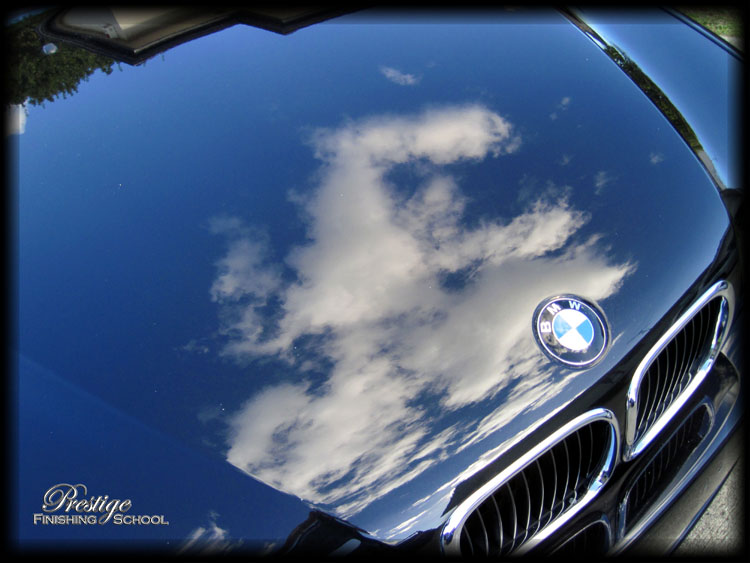
…and of course, the bonnet.
Both panels now absolutely gleaming.
It often takes a second glance to properly appreciate this shot. Initially, you might be mistaken in thinking that the vehicle’s shadow can be seen on the wall behind it… In fact, shadows are falling right-to-left. The perfection of the paint is actually causing a chameleon effect, with the wall being reflected so clearly on the painted surface that the rear quarter panel of the car becomes nearly invisible.!
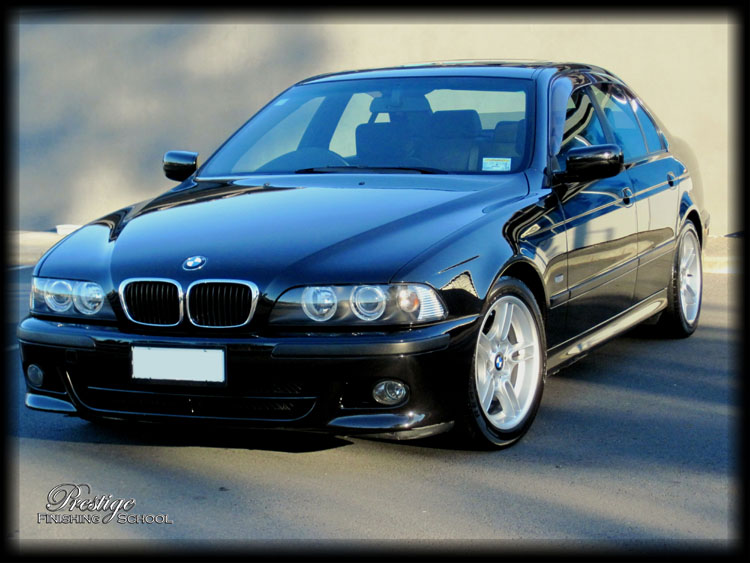
The combination of severe defects and typically hard BMW paint contributed to this detail running into nearly 24 hours work. The end result, as always, was deeply satisfying, and we are proud to present the most recent graduate from Prestige Finishing School!